Showing posts with label Slow-cooker. Show all posts

Monday, October 17, 2016

{Crock-Pot Lasagna}


I am a big fan of Lasagna. I am a big fan of Crock-Pots.
However, for some reason, putting those two things together, just didn't appeal to me all that much.
I don't know why, it just didn't sound good.
But thankfully, something made me just break down and try it one week.

And I am so glad that I did!
I think I may actually like it better than our regular, oven-baked Lasagna!
It was fast and easy to put together, and had such a great flavor.
I was worried about the texture being mushy and runny, but it was nice and thick and perfect!

I hope you try it out!


1 pound ground beef
36 oz. spaghetti sauce (about a jar and a half)
1 (16 oz) container cottage cheese
1/4 cup Parmesan cheese
1 egg
1 & 1/2 teaspoons Italian seasoning
1 box lasagna noodles, uncooked
2+ cups mozzarella cheese

Brown ground beef until no longer pink; drain well. Mix with spaghetti sauce; set aside.
Mix together cottage cheese, Parmesan cheese, egg, and Italian seasoning.
Line a crock-pot with a crock-pot liner or spray with cooking spray.
Spread 1/3 of the meat sauce mixture across the bottom of the crock-pot.
Break a few of the noodles into large pieces to cover the top of the sauce.
Spread half of the cottage cheese mixture over the noodles.
Sprinkle with a layer of mozzarella cheese.
Repeat layers with 1/3 of the meat sauce, noodles, remaining cottage cheese mixture, and mozzarella cheese. Top with a final layer of noodles, and the remaining meat sauce.
Cover and refrigerate until ready to cook.
Or
Cover and cook on low for 2 & 1/2 to 3 hours. During the last half hour, sprinkle another thin layer of mozzarella cheese. Cover and cook until noodles are tender when poked through with a fork, and cheese is melted and bubbly.
Serve!

Note:
-I used ground turkey in mine, and it worked great!
-I also used a Mexican blend cheese, which gave it more color, and the flavor was perfect!

Monday, April 18, 2016

Chicken Chili:

My Fiance's (ah! I still can't believe I'm saying that!)
sister made this for dinner the day we got engaged.
I was not necessarily thinking completely clearly that day, because I was (and still am) in shock, 
but I definitely remember how good this was!
It smelled so amazing while it was cooking, and tasted even better!
My mom and dad couldn't get enough of it either! And my mom is not crazy about this type of thing, but she loved it! It was pretty much addicting!!
I don't know how to describe it...it's like chili, but could also be a dip, really, and it's just plain good!! So eat it with a chip or with a fork, it doesn't matter!
Rina was super kind and shared the recipe with me! 
Mine did not taste as good as hers, but it was still good, and I really hope you try it out!!
There is no way to take a picture of this and make it look good, much less as fabulous as it actually is! But please take my word for it...it's good!!


2 chicken breasts
1 can Rotel (tomatoes and green chilies), not drained
1 cup frozen corn
1 can black beans, drained and rinsed
1 pkg. ranch dressing mix
1 & 1/2 tablespoons taco seasoning
1 (8 oz) pkg. cream cheese
Tortilla chips

Place the chicken in the bottom of a slowcooker.
Top with Rotel, corn, beans, ranch mix, and taco seasoning.
Stir gently to combine.
Top with cream cheese.
Cover and cook on low for 6-8 hours, stirring once or twice to blend the cheese.
Shred the chicken before serving.
Serve with tortilla chips!

Note:
-If this recipe is tripled, it will fill a 5-quart crock pot.
-If desired, you can use 1 tablespoon cumin, 1 teaspoon chili powder, and 1 teaspoon onion powder in place of the taco seasoning. Feel free to play around with the seasonings to your taste!


Monday, August 10, 2015

Slow Cooker Baby Carrots:

This is such a great recipe!
We are all about the crock-pots in this house, and it doesn't get much easier than this!
I love steamed carrots, but cooked carrots are entirely different. They tend to be so mushy and totally lost when it comes to flavor. But for some reason, the carrots in this recipe stay pretty crisp and the flavor is outstanding!
I hope you give it a try!


1 (16 oz.) bag baby carrots
1/4 tsp. salt
1/3 cup brown sugar
1 & 1/2 tblsp. butter
1/2 tblsp. parsley

Place all ingredients in a 1 - 2 quart crock-pot. Stir to combine.
Cover and cook on high for 4-5 hours or until tender.
Serve!


post signature

Monday, August 3, 2015

Super Sticky Baked BBQ Chicken:

We love grilled chicken legs in my house! Especially when they've been grilled with BBQ sauce and are nice and sticky! So yummy!
However, we have trouble getting them cooked all the way through, without burning them on the outside.
I was majorly craving some good BBQ, chicken legs, so when I came across this recipe, I decided to give it a try. I was not prepared for how fast, how easy, and how delicious the recipe would be!!
I made them for the 4th of July, and everyone loved them! They actually tasted SO much like grilled chicken legs!
I couldn't get a picture that truly showed how thick and sticky the BBQ sauce was, or how moist and tender and perfectly cooked the chicken was! But trust me, it was good!!!
I hope you try them out!!


8-10 chicken legs or thighs (with the bone-in and skin on)
2 cups BBQ sauce
Olive Oil
Salt & Pepper

Prepare a baking sheet by lining it with foil. Coat the foil with cooking spray.
Rub each piece of chicken with olive oil and place on the baking sheet. Sprinkle with salt and pepper; flip chicken and repeat with salt and pepper on the other side. Place chicken skin side down.
Bake at 425 degrees for 30 minutes.
Remove chicken from the oven, and raise the temperature to 450 degrees.
Meanwhile, if there are a lot of juices in the pan, drain off, blot off with paper towels, or use a basting bulb to suction out. Pour BBQ sauce in a bowl, and using a pastry brush, coat each piece of chicken (on both sides) with the sauce. Return to the oven for 7 minutes.
Baste the top of the chicken with more sauce; bake for 7 more minutes.
Again, baste with the remaining BBQ sauce, and bake for 7 more minutes.
Let stand for 10-15 minutes before serving!!

Note:
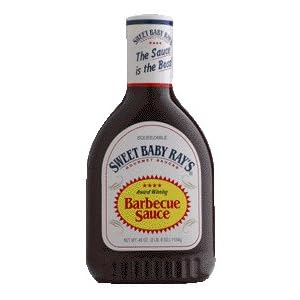
-Sweet Baby Ray's is our favorite BBQ sauce, but you can use any kind you want.
-I also like to make this a "Make-Ahead" dish, by letting it cool completely after baking, and place it all in a crock-pot lined with a slow-cooker bag. The next day, I just pull it out of the fridge, and put it in the crock-pot base on LOW for about 3-4 hours to heat all the way through!

post signature

Monday, June 1, 2015

My Grandma's Sloppy Joe's:

So, I really like Sloppy Joe's. A lot. I always have. It used to be something we had a lot during the Fall (I'm sure we had them other times, too, it's just that time of year stands out to me!). Dad liked to go hunting, and where I live, that means it was cold! So mom would generally make Sloppy Joe's and have them in the crock-pot, ready for whenever Dad would pop in for something to eat. And as a side note, that was before we had cell phones, so it's not like he could call and say he was on his way. I just thought that was kind of an odd, funny, weird, random thing that I wanted to point out.
Anyways, I've been making this recipe for Sloppy Joe's for years now, but as it turns out, it's been the wrong recipe!! Not the one my mom used to make!
So I dug up the old recipe and decided to try it out!
They turned out fantastic, actually, and pretty much my entire family loved them way more than what I've been making! I still like the old version too, but this one definitely brings back more memories!!
I hope you try them out and enjoy them as much as we do!


3 pounds ground beef
3/4 cup chopped celery
3/4 cup chopped onion
1 (8 oz.) can tomato sauce
2 tblsp. sugar
1 tblsp. cornstarch
1/2 tsp. salt
1 bottle Heinz Chili sauce

Brown beef in a large skillet until no longer pink; drain. Meanwhile, place celery and onion in a microwave safe dish and cover with water. Microwave on high until the water begins to boil - allow to boil for 30 seconds; drain. Add celery and onion mixture to ground beef and stir until well combined. In a small dish, whisk together tomato sauce, sugar, cornstarch and salt. Add to beef mixture. Pour the chili sauce into the meat mixture. Fill the bottle 1/2 full of water and shake well; add to meat mixture. Cook and stir over low heat. Cover and simmer until ready to serve.

Note:
-How fine you chop your celery and onion is up to you, but please don't leave it out! It adds SO much flavor!
-Prepare this ahead of time and place it in the crockpot on warm or low until ready to serve!
-This freezes really, really well.
-We love this served on a slice of THIS BREAD.
-Some of us also like to add a slice of cheese, but that's purely optional!
-This amount would serve my family for two meals, so I like to make it once, and freeze half for another day.

post signature

Monday, March 9, 2015

Roast Beef Sandwiches & Copycat Arby's Sauce:

Arby's and Chic-fil-A are definitely my favorite fast-food restaurants.
I just LOVE the waffles fries, grilled chicken, salads, and milk-shakes at Chic-fil-A.
At Arby's, my favorites are the Cheddar Road Beef sandwiches and the Jamocha milkshakes.
Thankfully, I don't live very close to a Chic-fil-A at all, and the nearest Arby's is still like 15 miles away. 
So when I saw this recipe for Arby's sauce, I just couldn't wait to try it!!
It's really, really good, and although I don't know if it tastes "just" like Arby's sauce, it's super close and makes a GREAT sandwich (as well as a nice dipping sauce for fries!!!)!
The sauce will stay in the fridge for a couple weeks, and the roast beef is made in the slow-cooker, so it's a really fun, impressive looking, super fast and easy main dish!!
Hope you try it out!!


2 lb. Beef Roast
1 cup water
2 tblsp. beef seasoning
Sliced American cheese
Arby's Sauce (recipe below)
Hamburger Buns, toasted, if desired

Place fresh or frozen roast in a slow-cooker. Add water, and sprinkle the beef seasoning over all.
Cover and cook on high for 6-8 hours, until it shreds easily with a fork.
(You can cook it longer as well. The more tender it is, the better.)
Serve on toasted buns with cheese and Arby's sauce!

Arby's Sauce:
1/2 cup ketchup
1 tblsp. apple cider vinegar
4 tblsp. water
4-5 drops hot sauce
2 tblsp. brown sugar
1/4 tsp. onion powder
1/4 tsp. garlic powder
1/4 tsp. salt

Place all ingredients in a small saucepan. Cook over medium heat for 20 minutes, stirring often, especially in the last 10 minutes. Allow to cool to room temperature.
Transfer to an airtight container. Lasts in the refrigerator for up to 2 weeks.

Note:
-If you don't like spicy food, don't be intimidated by the hot sauce. It really doesn't add any heat, just a really nice flavor. For someone who likes hot sauce, you wouldn't even be able to tell it's in here.


post signature

Monday, February 2, 2015

2 Ingredient Italian Chicken:

This chicken is so easy, so moist and so delicious! It may very well be one of my favorite ways to have chicken! 
We love it with a big toss salad, but I'm sure there's a ton of other ways to eat it too!
Let me know how you serve it!!


4-5 medium size boneless, skinless chicken breasts, thawed
1 (16 oz.) bottle Zesty Italian Dressing

Place chicken in a crockpot. Pour the dressing all over. Cover and cook on high for 3-4 hours (low for 5-6 hours) or until it easily shreds with a fork. Shred it all up and mix it well with all the juices in the crock-pot. This helps keep it all super moist. Serve it over a salad or any way you choose!

post signature

Monday, December 8, 2014

Easy Tex-Mex Chili:

I really LOVE chili, but the recipe we usually use, just wasn't cutting it for me. I do tend to like things a bit spicy, and the rest of my family tends to dislike spicy things.
In October, I had the opportunity to spend 3 amazing weeks with my brother and his family (including their brand new baby girl!) in New Mexico. I had the best time ever, and I'm still sad that my visit is over. 

Anyway, while I was there, my brother made chili for dinner one night, and it was SO good! I absolutely loved it and have been craving it ever since. However, I knew it would be way to spicy for the rest of my family.
So I stumbled across a Tex-Mex Chili packet. Tex-Mex things are usually a little less spicy than regular Mexican food, so I decided to try it out!
It ended up being so easy and so good! It had a little kick to it, but definitely wasn't really spicy. It ended up being a good win-win situation, because it had the kick I was missing, yet wasn't overly spicy at all, so even some of my family enjoyed it too!!!  
I hope you try it out!!!! 


2 pounds ground beef
4 (8 ounce) cans tomato sauce
1 (15 ounce) can red kidney beans, drained
1 (15.8 ounce) can great northern beans, drained
1 tsp. dried mustard
1 package McCormick Chili Tex-Mex seasoning mix*
Optional:
-corn chips
-shredded cheddar cheese
-chopped onions
-sour cream

In a large skillet or saucepan, brown beef until no longer pink; drain. Add tomato sauce, beans, mustard and seasoning mix. Cook and stir over high heat until well combined. Depending on how you want it, add 1-2 tomato sauce cans of water, until you reach the desired consistency.
Reduce heat to medium-low, cover and simmer for at least 15 minutes, stirring occasionally.
Serve with toppings of your choice!

Note:
-This is perfect to make ahead of time. If it's already warm, put it in the slow-cooker on low until you're read to serve it. If it's cold, put in in the slow-cooker on high until it gets nice and hot, and then reduce heat to low or warm until ready to serve.
-Serve it Cincinnati style instead! Click HERE!
-This is the packet I used. And it's gluten-free!! Unfortunately, the other McCormick Chili seasoning mixes are not. I don't know about other brands, so I if you want it to be gluten-free, please make sure to check all the labels.


post signature

Monday, September 15, 2014

Crock-Pot Apple Pie:

When I started figuring a few things out and actually making some gluten-free dishes that were enjoyable as well as edible, so many people kept telling me that I should make a cookbook.
After a while, I actually did look into it and consider it, but nothing stood out to me. My photos are nowhere near good enough for a cookbook (nor my recipes for that matter), I would have to put out SO much money to even start (they don't grow money trees where I live), and then the book itself would cost a fortune, and I definitely didn't want that!
With the type of person I am, and how you have to cook to be gluten-free, I was always experimenting and changing recipes. To re-publish a cookbook everyone year or so, was going to cost even MORE money!
I really have no clue what gave me the idea to start a blog, and I was pretty nervous about it, because I had NO clue what I was doing!! A year and half, 200+ recipes later - I still don't know what I'm doing, but I'm enjoying it, and I can change the recipe everyday if I want!!!

So I said all that to preface this - I've had this recipe on the blog for a while now, but I have changed it up a little (surprise, surprise!) the last few times I've made it, so I wanted to share with you the "new and improved" version!!
This is such an easy recipe to make, yet we hardly have any leftovers!
I think that's how it usually works - the dishes you slave over for hours, people can take or leave. But if it only takes a few minutes to throw together, everyone loves it!!
I hope you try it and enjoy it as much as we do!

Minister's Delight Recipe

1 box BettyCrocker Gluten-Free White cake mix (or cake mix of your choice)
1 stick (8 tblsp.) butter, melted
3 tablespoons brown sugar
1/2 cup chopped nuts, optional
2 cans of Apple Pie filling

Spray the inside of your slow-cooker with non-stick cooking spray. Add the pie filling and spread it out so it's even across the bottom of the slow-cooker. In a medium size bowl, mix together the cake mix, melted butter, brown sugar and nuts. Mix until well combined (this should be moist, but very crumbly). Sprinkle over the top of the pie filling. Cover and cook on high for 2-3 hours (longer is always better). Serve as is or with a dollop of whipped topping or a scoop of vanilla ice cream!

Note:
-You can use any brand of cake mix you like. I've not found a better tasting "gluten-free" mix than the BettyCrocker, but if you have one you like, you can definitely use that instead!
-You can change up the kind of cake mix and pie filling. I have seen cherry pie filling with a chocolate cake mix. Get creative!!
-Although Apple is by far my favorite, I've also used Blueberry pie filling, and it was very good!


Monday, August 11, 2014

Slow-Cooker Philly Cheese-steak Sandwich:

We tried out these sandwiches for the 4th of July this year. We had never made anything like it before, so I was a tad nervous about how they might turn out! But it worked great and everybody loved it!
You can customize it to your taste by choosing whatever toppings you like!
I hope you give them a try!
(please don't mind the picture...it really tasted good!)


1 & 1/2  - 2 pounds beef round steak (see note)
1 green bell pepper, sliced
1 medium onion, sliced
2 cups beef broth
1 envelope Italian dressing mix
Hoagie or Sandwich buns
Toppings:
-Lettuce
-Tomato
-Onion slices
-Mushrooms
-Provolone cheese slices
-Swiss cheese slices
-Mayonnaise
-Steak Sauce

Slice meat into 1/4-inch thick slices. Place in meat, peppers and onions in a crock-pot. Pour beef broth over all, and sprinkle with dressing mix. Cover and cook on Low for 5-6 hours or High for 2-3 hours.
Serve on toasted buns with desired toppings!

Note:
-When we made this, we used "Hoagie Meat" from our butcher. It was sliced just right for this dish.
-I don't really care for peppers that have been cooked to death, so I didn't put any in the crock-pot. I just sauteed the slices in butter, and then put them on my sandwich.
-The above picture is not the best picture ever, but it was the only one I got! It was my dad's sandwich, so that is not a gluten-free bun, but click HERE to find the awesome, gluten-free buns that we used!
-Click HERE to view on MyRecipe Magic, where you can find the nutritional information for this recipe!

Monday, August 4, 2014

Calico Beans:

I wouldn't really consider our family big "tradition" people when it comes to holidays, special occasions, etc.
I guess because we don't have any "big" traditions. They are mostly just small, seemingly insignificant things, but somehow they make a difference to us!
This recipe is like that. When they were living, I always lived very close to both sets of my grandparents, so we were always at one of the grandparent's houses for any given holiday.
We usually went to my dad's parents for the 4th of July.
My grandma always made BBQ, grilled chicken legs, and Calico beans (to name only a few things!).
I don't know how on earth they got the name and they definitely aren't much to look at, but they're really good and they will forever scream "4th of July food" to me!!!
If you like ordinary baked beans at all, you will love these!
I hope you give them a try!!


1 lb. ground beef
1/2 lb. bacon, cut into small chunks
1/2 cup ketchup
1 tblsp. mustard
3/4 cup brown sugar
1 & 1/2 tsp. vinegar
1 (28 oz.) can Baked Beans
1 (15 oz.) can kidney beans, drained and rinsed
1 cup frozen baby Lima beans

In a large skillet, brown beef and bacon until meat is no longer pink; drain. In a large bowl, combine ketchup, mustard, brown sugar and vinegar; mix well. Add meat and beans. Stir until well combined. Pour into a greased casserole dish.
Oven Method:
Bake at 350 degrees for 40 minutes or until hot, bubbly and lightly browned.
Slow-Cooker Method:
Pour into your crock pot. Cover and cook on high for 2 hours, or low for 4 hours.

Note:
-I often mix this up the day before I need it and I keep it in the fridge until I'm ready to bake it.
-Stay tuned for the "Philly Cheese-steaks" sandwich recipe (also pictured above) coming next week!


Monday, March 3, 2014

Slow-cooker Italian Pork Roast:

Here's another super easy, yet different recipe for a pork roast. I'm not a huge fan of pork, but I LOVE anything with Italian seasoning! It turned out so good and my whole family loved it! Hope you give it a try!! Don't judge it by the picture! It's incredibly hard to take a picture of shredded meat!!! But trust me, it tasted great!!


3 lb. Pork Roast
1 pkg. dry Italian dressing mix
1/2 of a 12 oz. jar of hot banana pepper rings
2 cups water
2 tblsp. Zesty Italian dressing
 
Place the pork in a slow-cooker. Add the remaining ingredients (using half the peppers in the jar as well as half of the juice). Cook on low for 8-10 hours. Shred with two forks. Serve as is or on buns if you desire!
 
Note:
-Our roast was frozen when we put it in the crock pot. We left it in all night, shredded it in the morning, and left it on low or warm until we ate it at lunch time. I will warn you, though, it doesn't smell that fabulous while it's cooking during the night!!! But, it tasted great!!! 
-I LOVE those banana peppers, but most of my family does not! So, we only used the juice of the peppers. It doesn't make the dish spicy at all, but it adds such great flavor, you don't want to leave it out. You could still serve it with peppers for whoever likes them, though!
 
post signature

Monday, December 16, 2013

Slow-cooker BBQ Pork:

Like I've said before, I'm not a huge pork fan. However, I'm beginning to realize that it just depends on how it's cooked. Pork, done the right way with the right things can be amazing! My whole family really enjoyed this and I hope you give it a try!


4 & 1/2 lb. boneless pork tenderloin/roast
3 & 1/2 cups apple juice, divided
28 oz. bottled BBQ Sauce
 
Place pork roast in a slow-cooker, and add 3 cups apple juice. Cover and cook on low for 6-8 hours or until tender and it shreds easily with a fork. Drain all liquid from the slow-cooker and shred the meat with two forks. Stir in remaining 1/2 cup apple juice and as much BBQ sauce as you want. We used about 7/8 of the bottle, but it's pretty much just to your tastes.
You can serve immediately or leave it in the slow-cooker on the warm setting until you're ready to serve it. Serve as is or on buns!
 
 
Note:
-Obviously, this makes a lot of meat, so depending on how much you need,
you may want to cut the recipe in half.
-Click HERE to find out where you can get some fabulous, gluten-free buns!!!
- You can use any BBQ sauce you want. Our favorite is Sweet Baby Ray's.


post signature

Monday, July 22, 2013

Apricot Pulled Pork:

I was nervous to try this, because it's one of those recipes that sounds good one minute, and the next minute your not real sure! We finally gave it a try and I was very surprised! It has a mild, slightly sweet flavor and it just turned out very well!! And you know from my last post that I'm not a big pork fan! I hope you give it a try!!!

1 cup barbecue sauce
1 & 1/2 cups apricot preserves
1 envelope (4 tblsp.) dry onion soup mix
2 tblsp. mustard
2 tblsp. soy sauce
3 pound pork roast

Place pork in a slowcooker. In a small bowl, whisk together BBQ sauce, apricot preserves, soup mix, mustard and soy sauce. Mix well. Pour over pork roast. Cover and cook on high for 4-5 hours, or low for 8-10 hours. Shred with two forks and serve!

Note:
-Make sure you check the label of your bbq sauce, soup mix and soy sauce. They are well known for having wheat hidden in them. We use "Sweet Baby Rays" bbq sauce, "Lipton" soup mix, and we have found gf soy sauce at Dollar General, of all places!!!
-The pork is pictured on a GF Bun from Eat'n Park and you can learn more about that in THIS post.


This recipe is originally from: sixsistersstuff.com
post signature

Sunday, July 14, 2013

Maple & Brown Sugar Pork Tenderloin:

I'm not a huge pork fan at all. I don't mind sausage every now and then, but I definitely prefer turkey sausage over pork, so I guess that really doesn't count! BUT, we had some pork tenderloin, so I was looking around for a way to fix it, and this was definitely a winner! Since it's cooked in the crock-pot, the meat was so moist and tender and the slightly sweet and sour sauce went with it very well! 
I hope you give it a try! 


2 lb. Pork Tenderloin
1 tsp. minced garlic
1/4 cup maple syrup (only 2 tblsp. if you are using pure maple syrup)
4 tblsp. Dijon Mustard
2 tblsp. honey
2 tblsp. brown sugar
1 tblsp. Apple Cider vinegar
1/2 tsp. dried thyme
1 tblsp. cornstarch
1 tblsp. cold water

Place the pork in a slowcooker.
In a small bowl, whisk together the garlic, syrup, mustard, honey, brown sugar, vinegar and thyme. Pour over the pork and turn to coat thoroughly. Cover and cook on high for 3-4 hours, or on low for 7-9 hours.
When ready to serve, if the liquid in the slowcooker is boiling, combine the water and cornstarch and slowly pour into the hot liquid and stir to thicken. If the liquid is not boiling, remove the meat to a serving platter and cover with foil to keep warm. Pour the juices into a saucepan and heat to boiling. Add cornstarch and water mixture and stir until thickened. Serve over tenderloin! 

Menu:
Maple & Brown Sugar Pork Tenderloin
Mashed Potatoes
Green Beans
Coleslaw

Note:
-For fast and easy clean-up, use a slowcooker bag in your crockpot!
They are my best friends! I don't use them all the time, but they are super handy and I love them!
If you haven't used them yet, you should definitely try them out!
You can find them with the other bags, foil, wax paper, etc, in your grocery store!


post signature
Recipe from sixsistersstuff.com

Monday, April 29, 2013

Ranch Chicken Enchiladas:


I often feel like I make the same thing for dinner every single day.
I know I don't, but I guess we just get in a rut, and there are times where I can't figure out what to make for dinner because it seems like we just had everything.
Today was definitely one of those days and anything I did think of making,
we were missing some key ingredient (or we had just had it!)!
I came across this recipe and it sounded super yummy
and I was shocked to find that we had all the ingredients!!!
They turned out so good, too!
(please excuse the picture - they really did look yummy!!!)
They do take a little while to put together, but they are totally worth it!! 
I really hope you give them a try!

3-4 chicken breast, thawed and cut into thirds
3-4 tblsp. taco seasoning
3 tblsp. dry ranch dressing mix
1 cup chicken broth or water
1 cup prepared ranch dressing
1 cup salsa
Shredded cheddar cheese
Corn tortillas wraps

Place chicken, taco seasoning, ranch mix, and chicken broth or water in a slow-cooker. Cover and cook on high for 3-4 hours or until chicken shreds easily. Shred the chicken and continue to cook on low until you are ready to use.
In a small bowl, whisk together the prepared ranch dressing and the salsa; set aside.
Coat a 9x13-inch baking dish with cooking spray. Spread 2-3 tablespoons of the ranch and salsa mixture over the bottom of the pan; set aside.
On a microwave safe plate, layer 4-5 tortilla wraps in between damp paper towels. Microwave approximately 1 minute or until warm and pliable
(you will need to use these first, and then heat more as you are ready to use them).
Assemble the enchiladas, by putting 1 tblsp. of the ranch/salsa in the center of a tortilla wrap. Add chicken and sprinkle with a little cheese. Roll up tightly and place in the pan, seam side down
(it's good if the tortilla rolls are packed tightly together in the pan. This keeps them from unrolling).
Repeat, making as many tortillas as you want. Once you are finished, sprinkle the entire dish with additional cheese. Bake at 350 degrees for 30 minutes or until cheese is melted and bubbly and everything is warm through. Drizzle with a small amount of additional ranch dressing if desired. Serve!

Note:
-Some in my family do not care for salsa, mainly because of the chunks of peppers and onions. So I put the salsa in a mini food processor and and processed until smooth. They really liked it this way.
-I cooked my chicken in the crock pot, but if you didn't have that much time, you could try Plan B: Boil your chicken in water until done. Shred with two forks. Place the shredded chicken, taco seasoning, ranch mix and water or chicken broth in a skillet. Saute over medium-high heat until most of the liquid is absorbed.
-Use more or less taco seasoning, depending on how spicy you like it.  

post signature

Saturday, March 16, 2013

Reheating Rotisserie Chicken:

One night, right before closing time at Sam's, my dad found an entire cart full of Rotisserie chickens for $2.00 each!!! We all have a great love of Rotisserie chicken, so he got several and I just wanted to share with you how we re-heated them. They generally aren't very expensive to buy in the first place, especially since they are hot and ready, but we have found them "discounted" at the end of the day numerous times at Walmart and Sam's (I'm sure other places have them as well). 


#1. Oven Method
Wrap the cooked chicken tightly in foil and place on a baking sheet. Bake at 375 degrees for 30-35 minutes or until heated through. 
This way was very good, although it did dry out the chicken slightly. 

#2. Crock-Pot Method
 Wrap the chicken tightly with foil. Put about 1/2-inch of water in the bottom of your crock-pot. Place the chicken in the crock-pot, making sure that the seams of the foil are on top the chicken, so no water can get in the foil. Cover and cook on low for 3 &1/2 - 4 hours.
This way was AMAZING!! It was SO moist and most of us actually liked it better like this than when you eat it straight from getting it from the store!

So I hope you will get some rotisserie chicken and try out one of these great re-heating methods! They are so nice since they are already cooked and everything!

Note:
-The ones we get are labeled "gluten-free" but I would still strongly recommend checking the label wherever you purchase yours, just to be safe!

post signature

Sunday, January 20, 2013

NOT Sweet 'n' Sour Meatballs:

To me, meatballs are good pretty much no matter what, but I think this is my favorite sauce for them.
It was wasn't too sweet, not too sour, not tangy....I really don't know how to explain it, except that it was really good and my whole family enjoyed them! I hope you try them out!

30 fully cooked meatballs (click here for my super easy recipe)
3/4 cup ketchup
3/4 cup grape jelly

For the oven:
Place meatballs, frozen or thawed, in a greased baking dish. In a small measuring cup, whisk together ketchup and jelly - this will be slightly lumpy because the jelly won't mix to be smooth. Just mix it to as smooth as you can. Pour over the meatballs and stir to evenly coat. Bake at 350 degrees for 20-30 minutes or until meatballs are hot through (it may take longer if your meatballs are frozen). Serve!

For the Slow-Cooker:
Place meatballs in a greased slowcooker. Pour sauce over meatballs and stir to evenly coat. Cover and cook on low for at least 3 hours or until meatballs are hot through (if they were frozen when you put them in the slow-cooker, they may take more like 4 hours). You can leave them on low or warm all day, if you want. Stir every couple of hours. Serve!

Note:
-If you are making this dish gluten-free, either use my recipe for meatballs or make your own. Most pre-made, packaged meatballs all have gluten in them. I have never seen any without.

post signature

Thursday, January 17, 2013

Slow-Cooker Ranch Potatoes:


These are very yummy and very easy! I'm not the biggest fan of ranch dressing (except when it comes to homemade!), but I thoroughly enjoyed this dish!

3 lbs. red or white potatoes, peeled and cut into 1-inch pieces (about 8 cups)
2 tsp. minced garlic
Water
1/2 cup prepare ranch dressing
1/4 cup shredded cheddar cheese
1/4 cup Parmesan cheese
1/2 tsp. garlic powder
1/2 tsp. onion powder
1/2 tsp. pepper
Dried chives

Place the potatoes and minced garlic in a greased slow cooker. Add enough water to just cover the potatoes. Cook on high for 3-4 hours or on low for 6-7 hours or until potatoes are fork tender. In a small bowl, mix together the ranch dressing, cheeses, garlic powder, onion powder and pepper. With a slotted spoon, remove potatoes from the crock-pot to a serving bowl. Pour ranch dressing mixture over the potatoes, and stir gently to even coat the potatoes. Sprinkle with chives and serve!


post signature

Sunday, January 6, 2013

SlowCooker Mashed Potatoes:

Finally! Something that isn't sweet!! These potatoes are SO yummy! We make them a day before we need them, and pop them in the crock-pot the next day. All the mess from making them is already done and cleaned up! They're on our menu every year for Christmas dinner, but they are fabulous all year long!

5 lbs. potatoes, peeled and cut into 1-inch cubes
1 tblsp. minced garlic
1 (8 oz.) package cream cheese
1 cup sour cream
2-3 tblsp. sour cream and onion powder or Ranch powder, optional

Place potatoes and garlic in a large saucepan  and cover with water. Cook on high for 15-20 minutes or until potatoes are fork tender. Drain, reserving water. In a mixing bowl, mash the potatoes until smooth. Add cream cheese and sour cream and mix until well combined. Add sour cream and onion powder or Ranch powder, if desired. Slowly, mix in some of the reserved water (small amounts at a time), until the potatoes are a little creamier than what you would normally like. Pour into a slow cooker. Cover and refrigerate overnight. Place the crock pot in the base and cook on Low for 3-4 hours, stirring every 30 minutes or so, or until hot through. Serve!


post signature