Friday, December 28, 2012

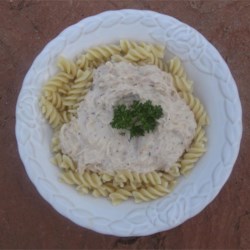
Glazed Apples and Sausage:

I made this for Breakfast Christmas morning. It was really fast and easy tasted really yummy!
My apples got a little overdone, but they still tasted great!


2 pounds uncooked sausage links
3 large tart apples, peeled and sliced
1 large onion, sliced or finely chopped (it's up to you)
1/3 cup water
1/4 cup brown sugar

Cook the sausage in a large skillet. Remove to paper towels and drain the grease from the pan. Place the apples, onion, water and brown sugar in the skillet. Cook over medium-high heat for 6-8 minutes or until the apples are tender, stirring often. Add the sausage links and cook and stir until the sausage is well coated and hot in the center. Serve!

post signature

Thursday, December 27, 2012

Pecan Pie:

Yesterday, I posted the recipe for my favorite pie crust, and today I wanted to share one of my favorite pies- Pecan!! I love it, my dad really loves and my brother and two sisters really like it too! When we were at my Aunt's for Thanksgiving, she made a pecan pie and it was SO yummy, so I got her recipe!!
Thanks, Aunt Bonnie!!!


2 tblsp. butter, melted
1/2 cup brown sugar
2 eggs
2 tblsp. cornstarch
1/4 tsp. salt
1/2 tsp. vanilla
1 cup light corn syrup
1-3 cups pecans, lightly chopped*
1 unbaked 9-inch pie shell

In a medium bowl, whisk together the butter, sugar, eggs, cornstarch, salt, vanilla and corn syrup. Place the pecans in the pie shell. Pour the corn syrup mixture over the top of the pecans. Bake at 325 degrees for 45 minutes to 1 hour. It took mine about an hour to bake, but it depends on the oven. It's done when you gently shake the pie pan, and the filling doesn't shake. Let cool completely before cutting.

Note:
-*the reason the amount of pecans is so varied, is because it depends on how many you want! I generally fill the pie shell about 1/3 - 1/2 full. You don't want much more than that, because then you won't have room for the corn syrup filling.  


post signature

Wednesday, December 26, 2012

Perfect Pie Crust:

I hope everyone had a great day yesterday! I had a fabulous day with my family and I can't believe Christmas is over:(
Anyways, my dad wanted Pecan Pie for Christmas, but I just had never found a pie crust I liked. They always fall apart or taste really nasty, so I came across this recipe and decided to give it a try. It was pretty easy and it turned out really good. I was very happy with it. So I hope you give it a try! It may seem intimidating at first, but just dig in and give it a try! Ree Drummond says that it doesn't matter what it looks like, just so it tastes good!!!

Sorry, I don't have a picture of the pecan pie! Just pumpkin!

3/4 cup butter, cubed and chilled until very cold
3/4 cup shortening, chilled until very cold
3 cups flour
1 tblsp. xanthan gum
1 tsp. salt
1 egg, beaten
1 tblsp. vinegar
3-5 tblsp. ice cold water

Place the flour, xanthan gum and salt in a food processor. Add the butter and shortening. Pulse until the mixture resembles course crumbs. Add the beaten egg, vinegar and 3 tblsp. water and pulse until mix comes together. Add more water, 1 tablespoon at a time, until dough is easy to handle - you don't want it to be too dry or too sticky - just easy to handle. Divide the dough in half and place place in two, 9-inch deep-dish pie plates that have been coated with cooking spray. Press the dough evenly across the bottom and up the sides of the pie plate. Flute the edges. Chill in the freezer for 15-20 minutes or until firm. Now it's ready to use for your favorite pie filling!!


post signature

Tuesday, December 25, 2012

Merry Christmas!!!
 
I hope you have a wonderful day -
remember Jesus is the reason for the season!

"And she brough forth her firstborn son, and wrapped him in swaddling clothes, and laid him in a manger, because there was no room for them in the inn."
Luke 2:7

post signature

Saturday, December 22, 2012

Snickerdoodles:

Here's another cookie on our Christmas Cookie List. These are really easy and super yummy!


Cookie:
1 cup shortening
1 & 1/2 cups sugar
2 eggs
2 & 3/4 cups flour
1 & 1/2 tsp. xanthan gum
1 tsp. baking soda
2 tsp. cream of tartar
1/2 tsp. salt

Coating:
2 tblsp. sugar
2 tsp. cinnamon

In a large mixing bowl, cream together shortening, sugar and eggs. Add remaining ingredients and mix until well combined. Chill for 1 hour or overnight. Form into 1-inch balls (a cookie scoop works best). Mix together the sugar and cinnamon. Roll each ball in the mixture. Place on a cookie sheet. Slightly flatten with your hand or with a glass. Bake at 400 degrees for 8-10 minutes, or until cookie springs back when you touch the top with your fingertip. Remove to wire rack to cool completely before storing in an airtight container.

Microwave Rice Pilaf:

This is the side dish I served with the Lemon Chicken the other night (click here for the recipe). It was super easy and most everyone really liked it. The veggie-picky eaters weren't as crazy, but their vote doesn't count!! I really liked it sprinkled with a little parmesan cheese. It made it taste more like a Rice Rosoto, which I happen to love! Hope you give it a try!

(Sorry, I didn't get a chance to take a picture!)

1 cup uncooked Instant Rice
1 cup water
1/3 cup finely chopped onion
1/3 cup finely chopped celery
1/3 cup finely chopped or shredded carrots
1/3 cup finely chopped green pepper, optional
3 tblsp. butter, cut into slices
1 tblsp. beef or chicken granules, depending on what meat you are serving with it
1/4 tsp. ground cumin
1/8 tsp. coriander
dash of pepper

In an ungreased, microwave safe dish, combine all ingredients. Stir to combine. Cover and microwave on high for 3 minutes. Stir. Microwave an additional 3-5 minutes or until veggies are tender and all the water is absorbed. Let stand 5 minutes before serving.

Note:
-The seasonings are completely up to you. I served it with chicken, so I used Chicken granules. I didn't have any cumin or coriander, but since I was having lemon chicken, I added 1/2 tsp. Lemon Pepper Seasoning. Feel free to experiment and be creative!!!
-The veggies are the same way. Leave out what you don't want, add more of what you like!


post signature

Friday, December 21, 2012

Nutmeg Meltaways:

This is one of the cookies we are making for Christmas. My mom and I love them!

Nutmeg Meltaways Recipe

1 cup butter, softened
1/2 cup sugar
1 tsp. vanilla
2 cups flour
1 tsp. xanthan gum
3/4 cup finely chopped walnuts
1 cup powder sugar
1 tblsp. nutmeg

In a mixing bowl, cream together the butter, sugar and vanilla. Add flour and xanthan gum; mix well. Stir in walnuts until well combined. Form into 1-inch balls and place on a cookie sheet. Bake at 300 degrees for 18-20 minutes or until the bottoms of the cookies are lightly browned. Cool on a wire wrack. Combine the powder sugar and nutmeg in a small bowl. After the cookies have cooled, roll each one in the sugar mixture. Store in an airtight container.

Note:
-These don't really freeze the best.

post signature

Thursday, December 20, 2012

Slow-Cooker Lemon Chicken:

A super easy and very yummy main dish that prepares itself!!!! This was really good and I think it even tasted better the second day! You can serve it over rice or eat it as is!

5-6 chicken breasts
1/2 cup chicken broth
1/2 cup lemon juice
4 tblsp. butter, cut into small pieces
2 packes zesty Italian seasoning

Spray your crock-pot with cooking spray and lay the chicken across the bottom. Add the chicken broth and lemon juice. Place the pieces of butter randomly over the chicken and sprinkle with the Italian seasoning. Cover and cook on low for 6-8 hours. There was a lot of broth with the chicken when it was done cooking, so I took the chicken out and served it on a plate. Just pour a little of the broth over top, once you have the chicken on a serving plate.  

post signature

Hamburger Gravy:

This was a nice change of pace kind of gravy and served over mashed potatoes, it was super yummy and really fast! I think it would also be good over pasta or biscuits, as well. I hope you give this quick dish a try!

Quick Hamburger Gravy Recipe

1 &1/2 lb. ground beef
1/2 cup onion, chopped
1/2 cup cornstarch
2 tblsp. beef bouillon granules (check the label for gluten)
dash of pepper
5 cups milk
Hot mashed potatoes

In a large skillet, brown the beef and onion over high heat until meat is no longer pink; drain. Stir in cornstarch, beef seasoning, and pepper. Mix well. Gradually stir in milk. Stir constantly over med-high heat until the milk thickens (this only took 3-4 minutes for me). Serve over mashed potatoes!


post signature

Monday, December 17, 2012

Eat 'n' Park:

We went Christmas shopping last weekend, and decided to eat lunch at Eat 'n' Park Restaurant. We went in intending to get their chips and cheese, but after glancing over the menu, we realized they had a Gluten-Free menu!!!!! I love it when places have that, except sometimes it can be a very small list of food choices and contain mostly salads. But not this one! It had lots of stuff on it and the thing we were most excited about was their Burgers.....on a gluten-free bun!!!!!!!! We decided to give them a try and OH. MY. GOODNESS!!!! We still can't stop talking about them!! They were light and airy and soft, just like a regular bun. They are, by far, the BEST gluten-free thing we have ever tasted! We're already trying to find a reason to go back! I personally think they ARE a reason!!

Visit their website by clicking on this link:
Enter your zip code to find a Restaurant near you,
browse the website and sign up to receive coupons!!!

As a side note:
their fries and Potato chips are not marked as gluten-free, because they are fried in the same oil as other things. That type of thing doesn't bother us, but you will have to make that decision based on what you can and can't handle. And always feel free to ask them questions about anything!!

I hope, if you can find one in your area, that you will go and check them out!
Let me know what you think!!!!

NOTE:
I just found out that you can also purchase the buns from there too! They are a little pricey, but so worth it!

post signature

Tuesday, December 11, 2012

Cinnamon Roll Muffins:

These were super yummy and not all that difficult. They definitely helped to curb the cinnamon roll craving and I know we will absolutely be making them again!!
I hope you give them a try!! Let me know what you think!


Batter:
1/2 cup butter, melted
3/4 cup milk
2 eggs
1 & 3/4 cup flour
1 & 1/2 tsp. xanthan gum
1/2 cup quick oats
3/4 cup sugar
1 tblsp. baking powder
1/2 tsp. salt
1/4 tsp. nutmeg
1/2 cup chocolate, butterscotch or cinnamon chips, optional

Filling:
3 tblsp. butter, melted
1/2 cup brown sugar
4 & 1/2 tsp. cinnamon

Icing:
1/2 cup powder sugar
1 tblsp. milk
1/2 tsp. vanilla

Preheat the oven to 400 degrees. Grease a 12 cup muffin tin; set aside. In a large bowl, whisk together butter, milk and eggs. In a separate bowl, whisk together the dry ingredients, including the chips. Add to the butter mixture and mix just until combined. Divide batter in half. Divide half of the batter between 12 muffin cups; spread the batter evenly across the bottom of the cup. Mix together filling ingredients and divide evenly between the 12 muffin cups.
 Divide the remaining batter over the filling and spread out evenly. Bake for 20-25 minutes or until golden brown. Let stand 5 minutes before removing from the pan. Remove to a wire rack with a cookie sheet or wax paper underneath. Mix together icing ingredients and drizzle over the muffins. Let stand 3-5 minutes. Serve!!!

Note:
-We made it with the chocolate chips, but I think you could leave those out if you wanted and they would still be great!
-We tried a few with paper muffin cups and they did work, but it was definitely easier without them. They just got kind of messy and sticky with the filling and icing.


post signature

Monday, December 10, 2012

Taco Pasta Salad:

When I first saw this recipe, I knew it would be something that I would like, but I was very worried that pretty much no one else in my family would!! So considering all that, I decided to give it a try (and no, my family does not normally love me for that)!!! It turned out so good - everyone loved it! It's more like hamburger helper, than pasta salad! So, I hope you give it a try! 

4 cups uncooked pasta
1 lb. ground beef
1 small onion, chopped
1/4 cup taco seasoning and water called for on package
1/2 - 3/4 cup Catalina Salad Dressing
1&1/2 cups shredded Cheddar Cheese, divided

Cook pasta according to package directions. Meanwhile, in a skillet, cook beef and onion over high heat until meat is no longer pink; drain. Stir in seasoning and water. Mix well. Drain pasta; add to meat mixture and stir to combine. Add 3/4 cup cheese and stir. Sprinkle the top with the remaining cheese. Cover and let stand 5-8 minutes or until cheese is thoroughly melted. Serve!

Note:
-I used spiral pasta, but you can use whatever you like.
-Make sure to check the labels of the taco seasoning and Catalina dressing for any gluten/wheat.
-Whenever I make taco meat for Taco Salad or Taco Baked Potatoes, I usually always have leftover that I stick in the freezer to pull out for Chili. This would be a super fast meal, if you used taco meat that was already prepared.

post signature

Saturday, December 8, 2012

Granola Bars (No-Bake):

We really like granola bars, but if you are on a gluten-free diet, they are hard to find and if you do find them, they are hard as rocks or disgusting. We have found one brand at Sam's that we like and can have, but we've been eating them for like 8 years now, so we're kind of sick of them!!! When we went to visit family over Thanksgiving, my cousin made some AMAZING granola bars! We ate them like crazy and she has graciously shared her recipe! I hope you will take 10 minutes and give them a try, because I know you'll love them! Thanks, again, for the recipe, Amber!!!

(Don't go by the picture....they taste FAR better than they look here!
Who knew it was so hard to take pictures of granola bars?)

2 &1/2 cups puffed Rice cereal
1 & 3/4 cups oats, quick or regular
1/4 cup ground flax seeds or additional oats
1/2 cup Add ins - this can be anything from dried fruit, coconut, nuts, sunflower seeds...whatever you like
1/2 cup honey
1/2 cup brown sugar
2/3 cup peanut butter
1 tsp. vanilla
1/2 cup chocolate chips or more add-ins

In a large bowl, combine first 4 ingredients. Combine and set aside.
In a small saucepan, heat honey and brown sugar over medium-high heat until the mixture comes to a boil, stirring constantly. Boil for 30-60 seconds. Remove from the heat and add peanut butter and vanilla. Mix until smooth. Pour mixture over dry ingredients and mix until really well combined. Let stand 5-10 minutes and then stir in the chocolate chips. Press evenly into a greased 9x13-inch baking dish. Let stand until cool. Cut into 24 bars. How easy was that?!!!!

Note:
-My cousin wrapped each granola bar in wax paper and just placed them all in a big bowl. We put the individual bars in snack-size zip-lock baggies.
-When I made these, I didn't have any ground flax seed, so I just added extra oats, but my cousin used flax seeds and it didn't change the taste, just added another "healthy" component!!
-So far we have tried dried cranberries, raisins, and dried blueberries, all of which were delicious!
-You could use Rice Crispies in place of the puffed rice, but I think it's better with the puffed rice and plus it's healthier.
-I've not yet tried it, but they say these freeze really well. If there is ever a time when they last long enough for me to put some in the freezer to try, I will let you know how it works!


post signature

Friday, December 7, 2012

Brown Sugar Garlic Chicken:

I wasn't real sure about this recipe before I made it, but it actually tasted really yummy and wasn't that hard at all. Everyone in my family enjoyed it and will definitely be making it again.
I hope you will give it a try!


4 boneless, skinless chicken breasts, thawed
4 cloves of garlic, minced
1 tsp. olive oil
4 tblsp. brown sugar

Spray a baking dish with cooking spray. Pat the chicken dry with a paper towel and place in the baking dish. In small sauce pan, cook the garlic in the oil until tender. Remove from the heat and stir in the brown sugar. Spread evenly over the chicken. Bake at 500 degrees from 15-30 minutes or until chicken is no longer pink. Place the chicken on a serving platter and serve!

Note:
-It's not a typo......it really bakes at 500 degrees!


post signature

Thursday, December 6, 2012

Sweet Potato Crisp:

I am not a huge fan of sweet potatoes at all, but I am fan of apple crisp...mostly because of the crisp!!!
So in an effort to come up with a quick side dish for dinner the other night, Sweet Potato Crisp was born!
And I must say, that it was very good! And that's a lot coming from me, considering that the main ingredient was sweet potatoes! So whether you do or don't like sweet potatoes, I hope you will give this dish a try! I think it will be making an appearance on our Christmas Dinner Menu!


2 (29 oz.) cans of Sweet Potatoes
2 tblsp. cornstarch
3/4 cup brown sugar
3/4 cup oats
1 tsp. cinnamon
6 tblsp. butter, slightly softened

Drain the juices from the cans of potatoes, reserving 3/4 cup. Place potatoes in a greased casserole dish. In a small glass or bowl, whisk together the reserved juice and the cornstarch. Pour over potatoes. In another small bowl, combine the sugar, oats and cinnamon. Cut in butter using a fork and stir until mix is completely blended. Sprinkle over the potatoes. Bake at 375 degrees for 25-30 minutes or until potatoes are hot and topping is golden brown and slightly crisp. Serve!

Note:
-Some of the pieces of potatoes in the can are kind of big. You can cut these if you want, but the potatoes cook down a little bit during the baking process, and you don't notice any big pieces when you serve it, so you don't have to worry about it, if you don't want to.
-Some chopped walnuts or pecans would be great mixed in with the topping ingredients!
-This made enough to serve my family of 7 plus a couple of servings leftover, so you may want to only make half the recipe if you are cooking for less than 6 or 7 people....unless they REALLY like sweet potatoes!!


post signature

Tuesday, December 4, 2012

Chocolate Pudding from scratch:

I just love pudding, and this was super fast and easy!
Chocolaty and yummy, it was a big it at our table
and I hope you'll give it a try too!

Homemade Chocolate Pudding Recipe

1 cup sugar
1/2 cup baking cocoa
1/4 cup cornstarch
1/2 tsp. salt
4 cups milk
2 tblsp. butter
2 teaspoons vanilla

In a medium saucepan, whisk together the first 4 ingredients. Gradually whisk in the milk. Heat over medium-high heat. Cook and stir until mixture begins to thickens to desired thickness. Remove from heat and stir in butter and vanilla. Mix until butter is melted. Pour into a large serving bowl, or individual serving dishes. Serve right away or chill until ready to serve!

Note:
-This was good as is, but you could also add a little extra to it by serving the pudding topped with whipped cream, m&m's, lightly crushed pretzels, peanut butter chips, chopped peanut nuts or use it as a dip for strawberries! The list goes on and on!

Saturday, December 1, 2012

Knox Blox:

Knox Blox, Jell-O Jigglers, whatever you want to call them....they're good and so fun!
I know they are normally gluten-free, but just incase you don't have the recipe,
I thought I would go ahead and share it!
I hope you enjoy!


4 cups boiling water
4 pkg. unflavored gelatin (Knox)
3 pkg. Strawberry gelatin (or any flavor you want)

Make sure the water has come to a full, rolling boil. Stir the Knox and jello into the water with a whisk, until gelatin is completely dissolved. Pour into a 9x13-inch baking dish. Refrigerate for at least 4 hours, or until set firm. Cut into squares. Serve! Store leftovers in an airtight container in the refrigerator.

Two Great Finds:

I hope everyone had a good Thanksgiving!
We had a wonderful time visiting with my dad's brother and sister and their families in the Carolina's.
While we were there, my aunt bought us some gluten-free bread.
Now, we normally don't buy any bread because any that we have
 tried has been totally DISGUSTING, so we don't even look at it anymore.
BUT, the bread that she got us was AMAZING!
 I'm talking moist, airy and simply delicious!
Three things that you usually will never find in Gluten-free bread!
The brand is "Glutino" and you can check out their website here.
I hope you'll check it out...I'm telling you, you'll be impressed!


You can go to the site and find a store where you can purchase the bread.
Before we came home, we made sure to get an extra loaf for the freezer!

Which leads me to another pretty amazing find:
~Earth Fare~
Earth Fare is a chain health food grocery store and they have lots of gluten-free stuff.
I had never heard of one before, but my cousin lives near one and goes there sometimes,
  so my aunt took us in to see it.
Again, it's health food, so everything isn't gluten-free, but they have lots of stuff that is.
I would definitely recommend checking it out, if you ever have the opportunity.
You can check out their website here and see if you can find a store near you.
So far there are only a few stores (mostly in the south/east).
I'm sure it's safer on the budget that I don't live close one, but it's so nice to know that something like this is out there!
Let me know what you think the bread and the store if you get to try either of them!


Thursday, November 22, 2012


Hope everyone has
a great day!!!

"So we thy people and sheep of thy pasture
 will give thee thanks forever:
we will shew forth thy praise
to all generations."
Psalm 79:13

Tuesday, November 20, 2012

Fried Fish:

We very rarely fry anything, but my dad bought a lot of Walleye Fish and no matter how I cook it, no one but him likes it! It's such a salty tasting fish, and we just don't care for it. So in an effort to try to use up this fish, I decided to at least try frying it. We found a a great fish fry coating, and so we gave it a try. Everyone actually really liked, except my dad!!!! Oh, well! You can't always please everyone! I hope you give it a try!


8 fish fillets, any fish you want
2 cups breading
1 egg
2 tsp. water
Oil for Frying
Tartar Sauce for serving (click here for my recipe)

Heat oil to 350 degrees. Rinse fish with cold water; pat dry with paper towels. Place breading in one dish and set aside. Place eggs and water in a separate dish and beat well. Dip fish in egg and then roll in breading, pressing to make it stick really well. Carefully place in the oil, two fillets at a time. Cook until golden brown, and fish flakes easily. Drain on paper towels. Serve with tartar sauce!

Note:
-Click here for the recipe for some awesome onion rings that we served with this!
-Although my dad did not care for this breading, the rest of us really liked it, so I wanted to share it with you. We got it at Walmart in the baking isle with other flour and breading.


Monday, November 19, 2012

Onion Rings:

Onion rings are one of my mom's favorite things and I absolutely love them too!
Until this evening, I thought I would probably never have a decent onion ring again,
since they are all made with flour. But that has all changed,
 thanks to a surprising "batter" we finally came up with!!!


Ingredients: (amounts vary depending on how much you want to make)
Some pancake batter (click here for my recipe)
Onions, sliced into 1/2-inch rings
Oil for frying

Heat the oil in a deep fryer to 350 degrees. Dip onions in the batter, making sure they are well coated. Carefully place a few onion rings at a time into the hot oil. Cook until the underneath is golden brown and then flip the rings over so the other side can cook. Remove from the oil when the rings are dark golden brown all the way around. Drain on a paper towel lined dish. If you are making a lot of rings, place the cooked ones on a cookie sheet lined with several paper towels. Keep warm in a 200 degree oven, until ready to serve. Enjoy!!!

Thursday, November 15, 2012

Chicken Veggie Casserole:

This was great for a chilly day!
It was easy to put together and was pretty yummy!
I hope you give it a try!

Chicken Veggie Casserole Recipe

2 cups cooked chicken, cubed
1 (15 oz) can of whole potatoes, drained and sliced
4 cups canned green beans
2 cups frozen corn
1 batch of cream of chicken soup (recipe here) prepared and cooled
             or just one can of cream of chicken soup, if you are not making this gluten-free
1/2 cup milk
1/4 tsp. dried thyme
1/4 tsp. black pepper

Combine the soup, milk, thyme and pepper. Mix well. Add the chicken, potatoes, green beans and corn. Stir until well combined. Pour into a greased casserole dish. Bake at 400 degrees for 15 minutes or until heated through. OR, you can cover the dish, and place in a 200 degree oven for several hours, until heated through and your ready to serve.

Note:
-Feel free to adjust the amounts of each ingredient to your tastes. You can add more potatoes and less veggies, or leave out the potatoes and add more veggies, leave out the chicken....whatever you want!!
-If you are making my recipe for a can of cream of chicken soup, it would be best to make it in advance and chill it for several hours so that it really thickens up. You can make this casserole right after you make the soup, of course, I just like it better after the soup has chilled, but it's not absolutely necessary!
-This is a good dish to make ahead of time, cover and refrigerate until you are ready to bake it. Just allow about 10 extra minutes of baking time, since the casserole will be much colder.


Wednesday, November 7, 2012

Quick and Easy Apple Salad:

5 minutes before dinner was ready last night, I thought it would be great to have a sweet side dish. 5 minutes later, this recipe was found, made and on the table! Now that's what I call quick! And it tasted really yummy! I hope you give it a try!

1 cup Heavy Whipping Cream
1 tblsp. sugar
3 medium-large Apples, peeled and diced
1/2 tsp. cinnamon or apple pie spice

Whip cream in a mixer until soft peaks form. Add the sugar and beat until stiff peaks form. Fold in apples and spice. Serve!

Note:
-I made this recipe as is, but I really think it would be a great base for tons of add-ins. Chocolate, butterscotch or peanut butter chips, chopped nuts of any kind, raisins, chopped candy bars....the list goes on and on, so be creative and I would love to know what you come up with!!

Tuesday, November 6, 2012

Monday, November 5, 2012

Dreamy S'more Pie:

My sister celebrated her 20th birthday on Sunday and this is the dessert that she picked out. I hadn't made it before, but 2 of Kelley's favorite things are cream cheese and hazelnut spread, so I gave it a try for her! It turned out pretty amazing and she loved it! I thought it was okay, but 2 of my least favorite things are cream cheese and hazelnut spread, so if you like those things, then I'm sure you'll love this!
Since we have both gluten-free and gluten-filled eaters in our home, I made one pie with a graham cracker crust and one without a crust. I hope you try it out!!

Dreamy S'more Pie Recipe
-With a graham cracker crust-

-Without a crust-
1 (8 oz.) pkg. cream cheese, softened
1 & 1/4 cups heavy whipping cream
1 (13 oz.) container chocolate hazelnut spread
3 cups mini marshmallows
1 (9-inch) graham cracker crust (omit if you are making this gluten-free)

In a mixing bowl, cream together the cream cheese and whipping cream until well mixed and very thick. Add hazelnut spread and mix well. Pour into prepared crust, or a serving dish. Cover and chill for at least 3 hours. Right before serving, top with marshmallows - press gently into the filling. Broil about 6 inches from the heat 1-2 minutes or until marshmallows are golden. Serve!!!

Note:
-This is NOT a healthy dish in any way. I just wanted to make sure everyone understood that!!
-Philadelphia cream cheese would be the best for this. I used a generic brand, and was left with little tiny lumps that wouldn't really mix in. Philadelphia cream cheese would mix much better.
-If you don't know, Hazelnut spread is found with the peanut butter in most grocery stores.
-Make sure you DO NOT walk away while the marshmallows are in the oven! They turn really fast and you have to watch them closely (unless of course you like your s'mores made with burnt marshmallows!).

Saturday, November 3, 2012

Grandma Wagner's Pumpkin Roll:


My grandma was an amazing cook!
We used to eat dinner at her house every Sunday after church
and I will never forget all the amazing meals she made,
but mostly I won't forget her desserts!!!
Among a HUGE list of desserts she made, is Pumpkin Roll.
I really enjoy making them and I hope you will give them a try!


3 eggs
1 cup sugar
2/3 cup canned pumpkin
1/2 tsp. lemon juice
3/4 cup flour
1 tsp. xanthan gum (omitt if not making gluten-free)
1 tsp. ground ginger
2 tsp. cinnamon
1/4 tsp. nutmeg
1/4 tsp. salt
1 tsp. baking powder
Finely chopped walnuts, optional

Filling:
1 (8 oz.) pkg. cream cheese
1 cup powder sugar
1 tblsp. butter, slightly softened

Beat eggs in a mixing bowl. Add sugar and beat until light and fluffy. Add pumpkin and lemon juice and mix until well combined. Add dry ingredients and mix well, scraping down the sides of the bowl as needed. Spray a jelly-roll pan with cooking spray. Cut a piece of parchment paper (longer than the pan) and press into the pan. Spray the paper generously with cooking spray. Pour batter onto parchment paper lined baking sheet and spread out evenly all the way to the edges. Sprinkle with chopped nuts if desired. Bake at 375 degrees for 15 minutes. Meanwhile, mix together filling ingredients; set aside. Lay out a kitchen towel. Place a piece of wax paper on the towel. Sprinkle wax paper with powder sugar.
 Carefully, flip the cake out onto the wax paper - parchment paper up. Slowly, pull the parchment paper off the cake. Let stand for about 2 minutes. Roll up the cake, wax paper, and towel together, starting at the short end. Let stand 5 minutes.


Unroll, and spread the filling over the cake to within 1-inch of the edges. Spread carefully, or else you might tear the cake. Roll the cake, starting at the short end, carefully pulling away the wax paper from the cake as you roll. When you reach the end of the cake, leave on the wax paper. Place in a 9x13 baking dish. Refrigerate for about 2 hours or until chilled firm. Remove from the wax paper and gently wrap in foil. Refrigerate until ready to serve. Slice in 1/2-inch slices to serve.

Note:
-It is best if the cream cheese for the filling has NOT been frozen....once it's thawed, it tends to make the filling runnier and that's not what your looking for! 


Saturday, October 27, 2012

Homemade Applesauce:

My grandma used to make the best applesauce ever!
I always loved whenever her and mom would make it
and then freeze it to have all year.
Unfortunately, there was no recipe.
So I went on a hunt looking for a good applesauce recipe
 and this one turned out super yummy and extremely easy.
We all really enjoyed it and I hope you like it as well!


8 cups apples, peeled, cored and diced
1 tblsp. lemon juice
1/2 - 1 cup sugar

Place apples in a large saucepan. Add enough water to just barely cover the apples. Cover and cook over medium-high heat until apples are very tender, stirring occasionally. Place in a blender, or use an immersion blender right in the pan to mash the apples to your preference - smooth or chunky. Add lemon juice and sugar. Taste to see if you need more sugar...it will depend on the kind of apple you use and how sweet you want it to be. Add more as needed. Cook and stir for another 3-5 minutes on low, to allow the sugar to dissolve and the flavors to blend. You can serve immediately, let cool a little or let cool completely.


Thursday, October 25, 2012

Two-Tone Brownies:

My whole family would just about rather eat cookie dough than the cookie itself!!
My sister came across this recipe and decided to try it out!
We were afraid it would be too sweet, but it really wasn't.
They tasted super yummy and were very fun! Hope you give them a try!

Two-Tone Fudge Brownies Recipe

1 batch Brownies, click here for my easy recipe
1/2 cup butter, softened
1/2 cup brown sugar
1/4 cup sugar
3 tblsp. milk
1 tsp. vanilla extract
1 cup flour
1/2 tsp. xanthan gum
1 cup chocolate chips

Prepare brownies according to directions in a 9x13 pan. Bake and allow to completely cool.
In a mixing bowl, cream together the butter and sugars. Beat in milk and vanilla. Add flour and xanthan gum and mix until well combined. Stir in chocolate chips. Using two spoons or a cookie baller, drop dough all across the top of the brownies. Use an offset spatula and spread the dough out evenly. Cut into squares. Cover and refrigerate until ready to serve.

Note:
-The original recipe called for 3/4 cup chopped walnuts in the brownies...we didn't care for this, so we omitted them, but if you would like them, feel free to add them in!!!
-Make sure your brownies are completely cooled, because if they aren't, you will tear them all up when you spread the dough out.
-These don't have to chill for a certain amount of time, but they are best if they can chill for maybe an hour at least before you serve them.


Tuesday, October 23, 2012

Apple Coffee Cake:

We have a ton of apples right now,
and I am SO enjoying find things to do with them!
I was looking through apple recipes, and came across this cake.
It sounded good, so I gave it a try and it turned out great!
I'm not a coffee drinker, but they told me it would be great for breakfast with a cup of coffee.
I did eat it for breakfast and it was good, so I can vouch for that part! 
I hope you give it a try!

Picture of Apple Coffee Cake with Crumble Topping and Brown Sugar Glaze Recipe

Cake:
1 stick (8 tblsp.) butter, softened slightly
1 & 1/2 cups brown sugar
2 eggs
2 cups flour
1 & 1/2 tsp. xanthan gum
1 tsp. baking soda
2 tsp. cinnamon
1/2 tsp. salt
1 cup sour cream
1 tsp. vanilla extract
3 & 1/2 cups apples, peeled and chopped

In a large mixing bowl, cream together butter and sugar. Add eggs, one at a time, mixing well after each addition. In a small bowl, whisk together flour, xanthan gum, soda, cinnamon and salt. Add 1/3 of the flour mix to the butter mixture and mix well. Add 1/3 of the sour cream. Repeat both steps two more times until the flour and sour cream are gone. Add the vanilla and mix well. Stir in the apples. Pour into a buttered 9x13 inch baking dish.

Crumb Topping:
1/2 cup brown sugar
1/2 cup quick oats
1/2 tsp. cinnamon
4 tblsp. butter, softened

Combine all ingredients in a small bowl. Sprinkle over the top of the cake. Bake at 350 degrees for 35-45 minutes or until toothpick inserted in the center comes out mostly clean. Let cool 10 minutes before moving on to the next step.

Brown Sugar Glaze:
1/2 cup brown sugar
1/2 tsp. vanilla
2 tblsp. water

Mix all together in a small dish and drizzle over warm cake. Serve or let cool completely. Chill leftovers.

Note:
-You don't want the apples to be too small, but you want them to be slightly smaller than bite size, so that when  you get a bite of apple you also get some cake with it!!!
-The brown sugar glaze was good, but I think next time I make it, I will let it cool a little while longer and then use this powder sugar glaze instead of the brown sugar glaze:
1/2 cup powder sugar
1 tblsp. milk
1/2 tsp. vanilla

Monday, October 15, 2012

Banana Bread Muffins:

This is my grandma's recipe and I always think of her when I make it! The chocolate chips were something we added to the original recipe later on, but I'm sure that grandma would have approved 100%!!!! They are really easy and delicious! You could make it in a loaf pan, if you wanted, but we prefer to make most bread items in muffin tins. This is another thing from grandma! She used to make muffins all the time! It's good too, because it totally ensures that the center gets done without the outside burning! Hope you like the recipe!


4 large ripe bananas
2 eggs
1/4 cup canola oil
1/2 cup honey (or 1 cup sugar)
2 cups flour
2 tsp. xanthan gum
1 tsp. baking soda
1/4 tsp. salt
1/4-1/2 cup chopped nuts, optional
1 cup chocolate chips, optional

In a medium bowl, mash the bananas with a fork. Add eggs, oil and honey (or sugar). Mix together well. Add flour, xanthan gum, soda and salt. Mix just until everything is moist. Stir in the chocolate chips and nuts, if desired. Fill paper muffin cups 3/4 full. Bake at 350 degrees for 18-22 minutes or until golden brown and toothpick inserted in the center comes out clean. Serve or remove from muffin tin and place on a clean dish towel. Cover with another towel. Place in an airtight container, when completely cooled, and store in the refrigerator.

Note:
-You can mix the nuts in the batter, or you can sprinkle them on top. My sister has braces, so she can't eat nuts right now, so I sprinkle them on top of half the muffins, use my fingers to stick them to the batter and them bake them!

Wednesday, October 10, 2012

Betty Crocker GF Mixes:

Some of you may have tried the Betty Crocker GF Mixes before,
but if you haven't I thought I would share my take on them!!   


#1. I LOVE them!
#2. They are a little (okay, a lot) expensive :(

We try to keep at least one on hand, because it's nice to have.
We don't use them all the time, but they are nice.

We aren't fond of the cookie or the brownie mix. They might be "ok" if you are used to using boxed mixes for that kind of stuff, but we have NEVER done that, so we weren't at all impressed with them. We decided the recipes we have for those things were much better. The cakes, however, are really good.

You can purchase these at Walmart, Martins and other grocery stores. Like I said before, they are expensivee, but if you've been eating gluten-free for any amount of time, then you should know by now that gluten-free products ARE expensive. That's just how it is!!

A Tip:
Whenever I make a cake mix, I always add one package of Dream Whip to the mix.
 I did this with wheat-based cake mixes and have still done it with gluten-free cake mixes. It keeps things moist and really flavorful. It doesn't change the flavor of the cake in any way...just makes it better!
I get this at Walmart. It's in the same section as the gelatin.
I'm sure you can find it at other grocery stores as well.

So I hope you give the mixes a try. If for no other reason, but to support companies who are trying to make life a little easier for us!!

Tuesday, October 9, 2012

Slow-Cooker Creamy Italian Chicken:

Many of you may have seen this recipe or even made it before.
I have been seeing it all over (especially on Pinterest).
It sounded so good and we finally had all the ingredients on hand to make it!
I thought it was very easy and yummy!
I served it over pasta, but you could serve it over rice or mashed potatoes if you wanted.
Hope you like it! It's a great fall food!

Creamy Italian Chicken Recipe

4 chicken breasts, thawed
1 pkg. dry zesty italian dressing mix
1 (8-oz.) pkg. cream cheese, softened
2 ( 10-3/4 oz.) cans cream of chicken soup (Click here for the Gluten-Free equivalent)
Cooked Pasta, Rice or Potatoes

Place chicken in a greased slow-cooker. Sprinkle with italian dressing mix. In a small saucepan, combine the cream cheese and cream of chicken soup over medium heat, stirring constantly until well combined. Pour over chicken. Cover and cook on low at least 4 hours or until chicken is done. You can leave it in longer than that, just make sure it gets at least 4 hours. You can serve it as is, or shred or cube the chicken. Make sure you stir to combine everything before you serve it!

Note:
-This was great just like it was, but I think you could personalize it a little bit to your preference. I think some mushrooms would be awesome in this, and my dad said he thought it would be great with some salad shrimp. Some peas would be good too, I think. So have fun and make it your own!
-This recipe is very easy to double or triple, depending on how many you need to feed. I doubled the recipe for my family (7 people) and we had a little leftover.