Monday, February 3, 2014

Tips on making half of a recipe:

I am part of a pretty big family  - I mean, 5 kids (all over 13) at home and two parents. And there's even a 16-year-old boy in there! But still, for some reason, if a recipe serves 4, that's the amount I make and usually there's leftovers! I hardly ever make anything with two pounds of hamburger, and typically only use 4 chicken breast. We're just not big eaters I guess, at least that's what people tell us (unless it's chocolate chip cookies we're talking about!)!! That being said, there is lots of times that I only make half of a recipe or sometimes I even make a recipe and a half, depending on what it is and how many I'm cooking for. We have this fantastic measuring cup that has teaspoons, ounces, tablespoons and cups all marked on it, but after years of use, the lettering is starting to disappear and I was starting to panic!! Then I stumbled across this and was very excited! It may not take the place of my handy measuring cup, but it will definitely help!
Now I know there's people out there that can figure all this out in their head in two seconds, but I am NOT one of them. Plus, I second guess everything, and that doesn't help either. So if you're super smart and don't need this chart, I sincerely congratulate you!!!! If you're anything like me, here's a handy chart to help us out!!


post signature

Monday, January 27, 2014

Swedish Meatballs

I've had this recipe on the blog almost since the beginning, but I made a few adjustments and got a picture since then, so I thought it was time for an update! My family used to eat Swedish meatballs all the time, but we just made them out the McCormick mix you buy at the store, which of course has gluten in it. I found this recipe, and after some adjusting, it tastes just as good as the mix, and it's really not hard to make at all! As with most of my recipes, even if you're not following a gluten-free diet, you can still enjoy this dish! I hope you try it out and enjoy it as much as we do! Let me know what you think!


Now, before I get into the directions, I need to explain that this makes about 60 meatballs, and that's enough for my family for at least two meals. So, when I make this, I use half the meatballs, and freeze the rest for another meal. If you want to fix this using all the meatballs, you will need to double the sauce recipe.
 
Meatballs:
2 eggs
1/2 cup milk
1 1/2 cups crushed cornflakes
1 medium onion, finely chopped
1/2 cup parsley
1/4 teaspoon pepper
1/4 teaspoon allspice or nutmeg
1 lb. ground beef
1 lb. ground sausage

In a large bowl, combine all meatball ingredients except the beef and sausage. Mix together. Add meat and mix (with your hands is the best way, but you could also use a hand mixer) until everything is well blended. Shape into 1-inch balls using a cookie scoop. Place on a greased broiler pan and bake at 350 degrees for about 30 minutes or until lightly browned on the outside and no longer pink in the center. Remove meatballs to a baking sheet and let cool. Once they are cool, place in the freezer and allow to freeze for about 1-2 hours. Remove from the cookie sheet and place in a ziplock bag and freeze until ready to use!

Sauce for half the meatballs:
4 tblsp. butter
1/4 cup cornstarch
2 tblsp. beef seasoning
1/8 tsp. pepper
5 cups milk

In a large skillet or saucepan, melt butter. Combine cornstarch, beef seasoning, and pepper. Whisk into melted butter. Gradually whisk in the milk. Cook and stir over high heat until thickened and bubbly; stirring constantly. Reduce heat to low and add meatballs. Cook and stir until heated through. Sprinkle with parsley for garnish, if desired, and serve over hot cooked rice!

Note:
-I personally think that turkey sausage works the best in this recipe, because it tends to help the meatballs stay together better, but regular pork sausage works good as well.
-I would recommend partially thawing your meatballs, if they were frozen, before adding them to the sauce.


Monday, January 20, 2014

Seasoned Pretzels:

My sister got this recipe from her friend from school, and we absolutely loved it!
I don't know how to describe the taste. When you look at the ingredients, you kind of wonder how those things could taste good together, but somehow they work and taste amazing! Plus, they couldn't be any easier to make! 
I hope you give them a try!

1 cup canola oil
1/2 tsp. lemon pepper
1/2 tsp. dill weed
1/2 tsp. garlic powder
1 pkg. (3 tblsp.) ranch dressing mix
1 & 1/2 - 2 pounds pretzel sticks or twists
In a small bowl, whisk together everything but the pretzels. Place pretzels in a gallon ziplock bag. Pour the seasoning mixture over the pretzels. Seal the bag, and gently shake to coat the pretzels.
Pour onto a wax paper lined cookie sheet and spread evenly. Let stand until dry. Store in an airtight container and enjoy!
post signature

Monday, January 13, 2014

Orange Cream Brownies:

I posted a recipe for Mint Chocolate Brownies a couple of weeks ago, and I wanted to share another version of that. I can not decide which I like better - the orange or mint! They are both so good and so different! Just beware! They are pretty rich, so you might want to cut them small! I hope you try them out and enjoy them as much as we did!
 
 
Brownies:
2 cups sugar
2/3 cup cocoa powder
1 cup oil
4 eggs
1 & 1/2 cups flour
1 tsp. xanthan gum
1 tsp. salt
1 tsp. baking powder
1 tsp. vanilla
 
Orange Cream Filling:
3/4 cup butter
3 -4 tblsp. milk
3 cups powder sugar
1 & 1/2 tsp. orange extract
Yellow and Red food coloring
 
Glaze:
2 & 1/4 cups milk chocolate chips
2 tblsp. butter
 
In a large bowl, whisk together the sugar, cocoa and oil. Add eggs, one at a time, mixing well after each. Stir in flour, xanthan gum, salt, baking powder and vanilla with a spatula until thoroughly combined. Spread evenly into a greased baking sheet with sides. Bake at 350 degrees for 25-30 minutes or until toothpick inserted in the center comes out clean. Cool completely.
In a medium bowl, beat together milk and butter until combined. Add powder sugar and mix until well combined. Add more milk if needed, 1 tsp. at a time, until you reach desired consistency. Add the extract and food coloring, one drop of coloring at a time, until you reach the color you want. I'm not sure how many drops of food coloring I used, but I used equal amounts of red and yellow. Place in a Ziploc bag.* Cut the tip from one side on the bottom, and pipe onto the brownies. Spread evenly with an offset spatula. Freeze until firm.
Place chocolate and butter in a microwave safe dish. Heat for 30 seconds; stir. Heat an additional 10 seconds at a time, stirring thoroughly after each time, until completely melted. Pour over the frosting on the brownies and spread evenly. Chill until set. Cut into serving size pieces and serve immediately or store in an airtight container in the fridge. Enjoy!
 
Note:
-I put the frosting in a bag and pipe it over the top, because sometimes when you just plop the frosting on and try to spread it around, it tears up the brownies a little bit and I don't like brownie crumbs in the frosting!
 
post signature

Tuesday, January 7, 2014

SOUP DAY!!

I hope everyone is managing to stay warm today!!
It's about -8 degrees where we are, so we are staying inside!!
Unfortunately, my dad is out working in all this today.
So I'm going to have a nice, hot meal waiting for him when he comes home!
 
I think anything warm will do, but I also think soup works better than almost anything!
So if you you're looking for something warm today, check out some of my family's favorite soup recipes!
 
Broccoli Chowder Recipe
 
Vegetable Meatball Stew Recipe


Cheeseburger Paradise Soup Recipe
 
And I don't know about you, but soup always tastes better with muffins or bread!
Check out my recipe index and go to the breads/muffins section to see some great sides for any of these soups!!
 
 
http://karissawagner.blogspot.com/2013/11/pecan-pie-muffins.html  http://karissawagner.blogspot.com/2013/11/muffles.html http://karissawagner.blogspot.com/2013/10/pumpkin-donut-holes-muffins.html
http://karissawagner.blogspot.com/2013/06/greek-yogurt-chocolate-muffins.html  http://karissawagner.blogspot.com/2012/03/baking-powder-drop-biscuits.html 


post signature

Monday, January 6, 2014

Rocky Road Fudge:

At Christmas time for the last couple of years, I have made several batches of all sorts of fudge and several cookies. Generally, it took me roughly two days and was done at least a week before Christmas. But for some reason this year, I simply ran out of time and energy. I had all my family name one thing that they would really like, and we just made those things - on Christmas Eve!!! I came across this recipe at the last minute and since I had all the ingredients, I threw a batch together real quick. It was the first thing to disappear out of all the things we had!!! It couldn't have been easier and it was such a fun, yummy treat! I hope you give it a try!


1 (12 oz.) bag chocolate chips
1 (14 oz.) can sweetened condensed milk
3 cups mini marshmallows
1 & 1/2 cups finely chopped nuts (walnuts, pecans, peanuts....whatever you like)

Prepare a 9x13-inch baking dish with foil. Lightly spray the foil with cooking spray; set aside.
In a large microwave safe dish (I used a glass, 8-cup measuring cup), mix together the chocolate and milk. Heat in the microwave for 45 seconds; remove and stir. Microwave again, at 15 second intervals, stirring after each, until the chocolate is melted and smooth. Quickly stir in the nuts and marshmallows. Press the mixture into the prepared pan. Chill for about 60 minutes or until firm. Lift out onto a cutting board. Remove the foil and cut into squares. Serve!!!

post signature

Monday, December 30, 2013

Monkey Bread:

We used to always have a thing called "Wake-up Rolls" for breakfast on Christmas morning. It's a lot like monkey bread. When we first went gluten-free, I tried to make Wake-up Rolls gluten-free, but it just didn't work. This year, I really wanted to try it, so I searched and searched, and came across a recipe that looked amazing, and sounded pretty good. I was nervous about it, though, because the ingredient list was long, the instructions were even longer and nothing was really going right for me while I was trying to make them. Thankfully, they turned out AMAZING!!! I was beyond impressed and excited with how they tasted and how they were surprisingly easy to make! Please try them! I would HIGHLY recommend that you read all the way down through the instructions before starting, just so you can be familiar with everything. It's really not hard at all and doesn't really take that much time either. I hope you try them and enjoy them as much as we did!

Dough:
2 & 1/2 cups flour
1/2 cup tapioca starch
3 tsp. xanthan gum
1 tblsp. Rapid Rise yeast
3 tblsp. sugar
1/2 tsp. salt
1/4 cup instant vanilla pudding mix (dry)
1 tsp. baking powder
4 tblsp. butter
1/2 cup water
3/4 cup milk
1 egg, room temperature
1 tsp. cider vinegar
2 tblsp. canola oil
1 tsp. vanilla
The yummy gooeyness:
1/2 cup chopped pecans, optional
1/2 cup raisins, optional
1/2 cup sugar
2 tsp. cinnamon
1/2 cup butter
1 cup brown sugar
2 tblsp. maple syrup
2 tblsp. heavy cream
pinch of salt
1/2 tsp. vanilla
1. If you choose to use the pecans and/or raisins, place them into the bottom of a greased 9x13-inch baking dish (you could also use a greased bunt pan if you prefer). Set aside. Do not use a pan with a removable bottom, as the syrup would run through and make a huge mess.
2. In the bowl of a stand mixer, mix all the dry ingredients from the "dough" list, until well combined. Set aside.
3. Put water and butter in a glass measuring cup and microwave just until the butter has melted. Remove from microwave and stir. Add milk, stir. Add egg, cider vinegar, oil and vanilla; whisk to combine.
4. With the stand mixer running (using the paddle attachment), pour the wet ingredients into the dry ingredients. Scrap down the bowl if you need to. Allow to mix on medium speed for 3 minutes.
5. In a small bowl, stir together the 1/2 cup sugar and the cinnamon from the "gooey" ingredient list. 6. Form the dough into 3/4″ balls (I just used a cookie scoop) and roll them to coat them fully in the cinnamon/sugar mixture.
7. Place sugar coated dough into the prepared pan, on top of the pecans/raisins. Be sure to not tightly pack the dough into the pan, allow gaps between the dough. Repeat until all of the dough has been formed, rolled in the cinnamon/sugar mixture & placed in the pan. If you have any cinnamon/sugar mixture left, sprinkle it over the top of the dough in the pan.
8. In a small saucepan over low heat, melt the butter. Stir in the brown sugar, maple syrup, salt & vanilla. Stir until the sugar is dissolved. Stir in the heavy cream. Pour mixture over the top of the dough.
9. Allow the dough to rise for 20-30 minutes in a warm, draft-free place.
10. Bake in preheated 350 degree oven for 30-35 minutes or until dough is no longer "doughy" when a ball of dough is pulled apart.
11. When you remove the Monkey Bread from the oven, allow to sit in the baking pan for 5 minutes before turning it out onto a serving dish or plate.
12. To do this, place the plate upside down on top of the baking pan, and (while wearing oven mitts, just in case), quickly turn the plate and baking pan upside down. Your Monkey Bread should release from the pan without a problem. If there are still pecans and syrup in the baking pan, use a spoon and spoon the mixture over the top of the Monkey Bread. Let stand 5-10 minutes before serving. Enjoy!
post signature

Monday, December 23, 2013

Mint Chocolate Brownies:

I love chocolate and mint together! And if you look through my blog index, you'll notice we like brownies around here, too!!!  
This recipe was actually supposed to be completely different, but I didn't have some of the ingredients that it called for, so I looked through the cabinets, made a few changes and came up with this! And I have to say that it turned out pretty good! I took it to a potluck dinner at our church, and only came home with four brownies! Someone told me they tasted like an Andes Mint! I don't know, but they were good! Perfect for the holidays too!
Merry Christmas!
 
 
Brownies:
2 cups sugar
2/3 cup cocoa powder
1 cup canola oil
4 eggs
1 & 1/2 cups flour
1 tsp. xanthan gum
1 tsp. salt
1 tsp. baking powder
1 tsp. vanilla
 
Frosting:
3/4 cup butter, room temperature
3 - 4 tblsp. milk
3 cups powder sugar
1/2 tsp. mint extract
Green Food Coloring
 
Glaze:
2 & 1/4 cups chocolate chips
2 tblsp. butter
 
In a large bowl, whisk together the sugar, cocoa and oil. Add eggs, one at a time, mixing well after each. Stir in flour, xanthan gum, salt, baking powder and vanilla with a spatula until thoroughly combined. Spread evenly into a greased baking sheet with sides. Bake at 350 degrees for 25-30 minutes or until toothpick inserted in the center comes out clean. Cool completely.
In a medium bowl, beat together milk and butter until combined. Add powder sugar and mix until well combined. Add more milk if needed, 1 tsp. at a time, until you reach desired consistency. Add the extract and food coloring, one drop of coloring at a time, until you reach the color you want. I think I used about 5 drops. Place in a Ziploc bag.* Cut the tip one side on the bottom, and pipe onto the brownies. Spread evenly with an offset spatula. Freeze until firm.
Heat chocolate and butter in a microwave safe dish. Heat for 30 seconds; stir. Heat an additional 10 seconds at a time, stirring thoroughly after each time, until completely melted. Pour over the frosting on the brownies and spread evenly. Cut into serving size pieces and serve immediately or store in an airtight container in the fridge or just leave out at room temperature. Enjoy!
 
Note:
-I put the frosting in a bag and pipe it over the top, because sometimes when you just plop the frosting on and try to spread it around, it tears up the brownies a little bit and I don't like brownie crumbs in the frosting!
-I guess you could use any food coloring you want or none at all, but green says "mint" to me, so that's what I chose.


Monday, December 16, 2013

Slow-cooker BBQ Pork:

Like I've said before, I'm not a huge pork fan. However, I'm beginning to realize that it just depends on how it's cooked. Pork, done the right way with the right things can be amazing! My whole family really enjoyed this and I hope you give it a try!


4 & 1/2 lb. boneless pork tenderloin/roast
3 & 1/2 cups apple juice, divided
28 oz. bottled BBQ Sauce
 
Place pork roast in a slow-cooker, and add 3 cups apple juice. Cover and cook on low for 6-8 hours or until tender and it shreds easily with a fork. Drain all liquid from the slow-cooker and shred the meat with two forks. Stir in remaining 1/2 cup apple juice and as much BBQ sauce as you want. We used about 7/8 of the bottle, but it's pretty much just to your tastes.
You can serve immediately or leave it in the slow-cooker on the warm setting until you're ready to serve it. Serve as is or on buns!
 
 
Note:
-Obviously, this makes a lot of meat, so depending on how much you need,
you may want to cut the recipe in half.
-Click HERE to find out where you can get some fabulous, gluten-free buns!!!
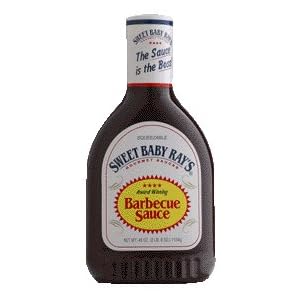
- You can use any BBQ sauce you want. Our favorite is Sweet Baby Ray's.


post signature

Monday, December 9, 2013

Pizza Bake:

This is such a simple, easy dish. Very fast, but very yummy!
I hope you try it out!!
 
 
1 (12 oz.) box rotini pasta
1 (28 oz.) spaghetti sauce
3/4 cup quartered pepperoni slices
1 cup mozzarella cheese
Additional pepperoni slices
 
Cook pasta according to package directions, just until almost done; drain and place in a large bowl. Add sauce and quartered pepperoni slices and mix well. Pour into a greased 9x13-inch baking dish. Sprinkle with cheese and top with additional pepperoni slices. Bake at 350 degrees for 25 minutes or until heated through and cheese is melted. Serve!
 
post signature